
This article covers how I set up a lab environment for malware analysis at home. After implementing the lab described here, you will be able to safely execute malware in your lab for analysis.
Why Lab Security Matters
The point of building a secure lab environment is to be able to analyze malware dynamically while protecting your host system and network from compromise.
Without the proper protections in place, you risk compromising your host computer. That could mean credential theft, persistence on the host, and lateral movement through your network possibly compromising other devices.
A secure lab environment focuses on:
- Isolation between the guest and host systems
- Network containment to prevent unintended outbound communication
- Rollback, allowing for easy recovery after analysis
Ultimately a well designed lab protects you from turning an analysis into a compromise.
Virtual Machine, Configuration & Isolation
I use VirtualBox as my hypervisor, running a Windows 10 virtual machine (VM) for analysis. VirtualBox is free and has an easy to use GUI and configuration settings.
After creating your virtual machine and adding your tools, you should take a snapshot of your VM. This creates a recovery point that you can return to after you analyze any malware. When loaded, it will return to exactly as it was when you took the snapshot, like you never ran the malware in the first place.
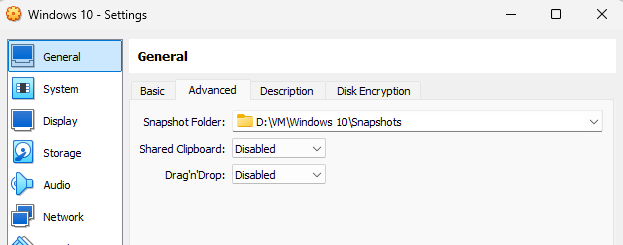
After you have your tools and snapshot it’s time to configure your malware analysis VM. When configuring your VM, it’s important to isolate the machine. There should be no way for the guest to communicate with the host. Go into the settings and disable “Shared Clipboard” and “Drag’n’Drop”.
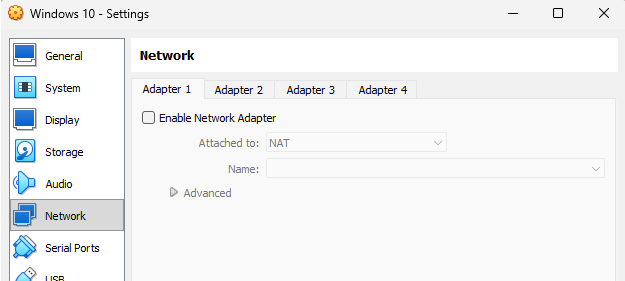
Then go into the network settings and disable the network for a safe baseline to start an analysis. If needed, it can be enabled in a safe, isolated way later.
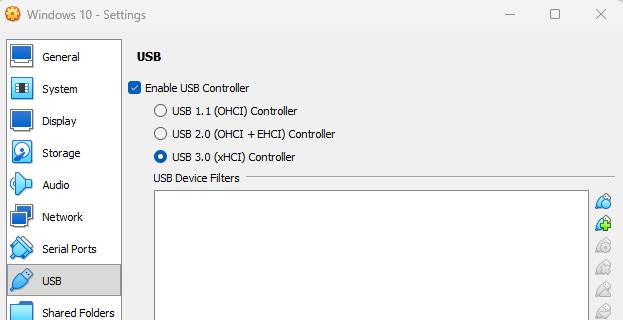
Check the USB settings. It’s ok for the USB controller to be enabled, but you want to check the “USB Device Filters”. These are disabled by default but they tell VirtualBox to automatically attach USB devices to the VM when plugged in. If there are any filters remove them.
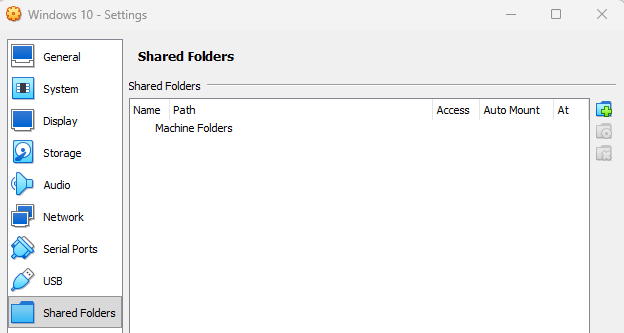
Now check the shared folders settings and make sure there are no shared folders.
Limitations
Some malware will check if it’s running in a VM and will either not execute or change its behavior to avoid being analyzed. There is also a very low chance but a possibility that malware can exploit a vulnerability in the hypervisor and “break out” of the VM allowing it to interact with the host machine. These exploits are very complex and valuable, as long as you are not examining malware made by a nation state you will be fine.
A Practical, Defensible Lab
This is a solid setup for malware analysis. It’s sufficient for most RE work, it’s isolated, easy to work with, and it’s free. You now have an environment to start analyzing malware safely.
From here, the most important thing is consistency. Keep the lab isolated unless you’ve loaded your clean snapshot and don’t enable any extra features you don’t need. As you gain experience you can expand your setup to allow networking or even change hypervisors. But this foundation is more than enough to begin learning and building real reverse engineering skills.